Showing posts with label dessert. Show all posts

Thursday, September 24, 2015

Oatmeal Cream Pies


Hello Fall! 

Today was a day of baking and making.  I haven't baked and cooked and prepped so much in such a long time and it felt wonderful to be in my kitchen doing just that.  I didn't intend to make so much in one day but I was just on a roll which resulted in pumpkin oatmeal, pumpkin spice creamer, frozen cookie dough bites, lots of grilled cheese, buffalo chicken strips and a few other miscellaneous items.  Before our morning play dates arrived at 8:30, I had my first batch of baked pumpkin oatmeal in the oven.  Oh sweet Lord almighty, they were heavenly.  The pumpkin oatmeal was the perfect way to start the season but this post is about something even sweeter with a trip down memory lane.   


As I'm sure they were for you, these were such special treats for us growing up.  I remember so many times when my dad would bring home a box for us or devouring them on road trips.  It's been so long since I've had an original Oatmeal Cream Pie, and this recipe is to blame. 

I love making goodies for my husband to take to work and these are extra special.  They disappear within minutes of his announcement of a homemade version of one of America's favorite treats.  These aren't sickeningly sweet like the store bought versions are which make them even more enjoyable. While the cookies are crispy on the edges and soft in the middle with hints of cinnamon throughout, it's the cream that sends these babies over the top.  

I have been making this recipe for 4 years now and haven't deviated from it once and they are perfect every time.  When I first started making these, there weren't a whole lot of recipes out there but now there are quite a few and after comparing them, this one takes the cake....or the cookie.  And no, they aren't "clean" like a lot of my recent recipes have been but I will be coming up with a clean version to share with you soon!  For now, enjoy these babies adapted from Nosh With Me (via The Craving Chronicles.)


Ingredients

Cookies:
1 cup butter
3/4 cup dark brown sugar
1/2 cup sugar
1 tablespoon molasses
1 teaspoon vanilla
2 eggs
1 1/2 cups flour
1/2 teaspoon salt
1 teaspoon baking soda
1 teaspoon cinnamon
1 1/2 cups quick oats

Filling:
2 teaspoons hot water
1/4 teaspoon salt
1 (7 ounce) jar marshmallow cream
1/2 cup shortening
1/3 cup powdered sugar
1/2 teaspoon vanilla

Directions

1.  Cream butter, sugars, molasses and vanilla in the bowl of a stand mixer.  Mix in eggs one at a time.
2.  Add flour, salt, baking soda and cinnamon.  Mix until just combined.  Stir in oatmeal.  Make sure you scrape the edges and the bottom of the bowl to make sure the oatmeal is incorporated throughout the whole batter.
3.  Using a small cookie scoop (or tablespoon) drop onto cookie sheets 2 inches apart.
4.  Bake in a 350 degree oven for 10-12 minutes (I usually do 10 minutes exactly).
5.  Once you take the cookies out of the oven, let cool for 2-3 minutes in the pan and then transfer to a wire rack. 
6.  While cookies are cooling, make the filling.  Dissolve salt in hot water and let cool.
7.  Whip shortening and marshmallow cream, add salt water, sugar and vanilla and whip until combined.
8.  Once cookies have cooled, spread cream on the bottom of one cookie and place the other on top.
9.  Try not to eat them all.  Unless that's why you made them.  And then contact me about a Beachbody program to help you lose the weight you gained from eating the Oatmeal Cream Pies.

Notes: Yes, hot water for the filling is necessary because the salt is necessary.  If you try to add the salt to the cream by itself, it won't fully incorporate into the cream.  If you have ever had an improperly seasoned sweet, you'll understand the importance of salt in sweets!  They are bland.  I hate when I forget the salt.

When I made this batch, I made a double batch which meant a long baking time because I had so many trays.  I let the batter sit on the counter and as a result, the butter melted due to the heat of the oven (makes our house hot!) and when I put them in the oven, they completely spread out and I ended up losing my last two trays of cookies.  So, keep the butter at a softened state by refrigerating the batter in between baking times.


Happy Fall, Y'all!


Thursday, July 30, 2015

Clean Eating Stuffed Apple "Pies"


Yes, huh.  You read that right.  Clean Eating Stuffed Apple Pies.  Because?  Because.  Because since starting my Beachbodyhttp://www.beachbodycoach.com/MelFiske journey, I have made a big effort to create delicious meals and desserts that you want to eat.  That are realistic.  That don't contain a thousand weird ingredients.  That tastes good.  Made out of ingredients you have in your pantry and don't have to order from Amazon.  Also, because I had granny smith apples sitting so prettily in a bowl on my table and were about to go bad so I had to think of something quick to do with them.  And because I wanted apple pie.

I'm sorry to say I don't have any after pictures.  But I don't think you need them.  All you need to see is before.  Why don't I have them?  Well, let me tell ya.  It was all apart of my plan to include them.  But then I cooked them for just a little longer than I should have and the skins exploded and peeled back leaving the flesh of the apple exposed and soft and full of flavor from the crumble.  It actually turned out to be a good thing as far as eating goes, but not as far as pictures go!  Don't worry, I have adjusted the baking times for the recipe so hopefully you don't have explosive apple skin.  :)

Ingredients:

3 large granny smith apples
3/4 cup quick cook oats
3 T melted coconut oil
3 T raw cane sugar
1 T cinnamon
1 t apple pie spice
1/4 c raisins
1/4 c walnuts

Directions:

1.  Using an apple core or paring knife, core the apples down the center, removing the seeds.  Don't core all the way through, once you have the seeds removed, stop to leave a base so the crumble stays in the apple.
2.  Mix all the ingredients together in a bowl.
3.  Take the mixture and stuff apples and place in a baking dish.  It's okay that the crumble overflows into the dish...trust me.
4.  Add 1 cup of water to the base of your cooking dish.
5.  Cover and bake at 350 degrees for 30 minutes.

Allow to cool before serving.  Though it's not clean, I couldn't resist serving these alongside some vanilla ice cream...because I wanted to!  My husband and boys devoured every last bite.  And yes, of course I did too!


So after they baked, the oatmeal in the bottom of the pan completely absorbed the water creating the most delicious baked apple pie oatmeal ever.  We scooped it up and served it with the ice cream...omg.  It was amazing!  This dessert inspired me to create a new baked oatmeal recipe for breakfast.  I can't wait to try it...can you have ice cream for breakfast though?  Because I feel like you might need to serve it with ice cream.  I think, yes.


Granny smith apples are on my shopping list because we will be having this again in the very near future.


Monday, September 22, 2014

Chocolate Cupcake with Salted Caramel Frosting


Because who doesn't love a perfectly delicious, moist, chocolate pillow of cake with homemade salted caramel frosting on top?  I can't think of a better use of time than to whip up a batch of these for my sister's best friend.  Laurie has battled cancer for a few years and has had multiple surgeries...and multiple hospital bills.  The cancer keeps coming back and she keeps fighting.  

Jesterz Improv is hosting a fundraiser for her and 100% of the ticket sales will help her pay hospital bills.  Laurie is a regular at Jesterz and they have no problem jumping on board to help her.  Along with a night of side splitting comedy, she is also having a bake sale, which is where these cupcakes come into play.  Whether you're bake salein' it, birthday bashin' or celebratin' the fact that it's Thursday, these cupcakes are a must bake.  (Go ahead and pin it).  

But these cupcakes, are for cancer.


The cupcakes have to be individually wrapped for the bake sale so I bought small plastic cups and put the cupcake inside then taped another one upside on top.  I made these labels to secure one side of the cup and used a small piece of clear tape to secure the other side.  Warning: frost the cupcake after placing the cupcake in the cup, otherwise you'll make a mess of the frosting.  Serve with a spoon or fork.


I found this incredible chocolate cake recipe.  I've always wanted a perfect chocolate cake recipe that makes everyone go, "THAT'S HOMEMADE?" and now I have one!  To share or not to share...SHARE!  Hershey's literally has the best chocolate cake recipe.  It's called "perfect chocolate cake" because it is.  Of course, I made a little tweak.  Right, I know the recipe says it's perfect but I just can't leave things alone.

Chocolate Cupcakes

Ingredients:

  • 2 cups sugar
  • 1-3/4 cups all-purpose flour
  • 3/4 cup HERSHEY'S Cocoa
  • 1-1/2 teaspoons baking powder
  • 1-1/2 teaspoons baking soda
  • 1 teaspoon salt
  • 2 eggs
  • 1 cup milk
  • 1/2 cup vegetable oil
  • 2 teaspoons vanilla extract
  • 1 cup hot coffee  <----- tweak
Does it need the coffee?  No.  Should you add the coffee instead of boiling water?  Yes.  

Directions:

1.  Stir dry ingredients together.
2.  Add eggs, milk, oil, vanilla and mix until combine.
3.  Pour in coffee and mix together, scraping down the side of the bowl.  (batter is thin)
4.  Pour 1/4 cup of batter in cupcake pans.
5.  Bake at 350 for 20-25 minutes. 

Yes!  It's that easy!  And the frosting is just as easy though it can be time consuming.

Salted Caramel Frosting

Ingredients:

1 lb. of butter
1 1/2 cup caramel*
1 cup of powdered sugar
1/2 t vanilla
1/2 t salt 

*To make the caramel, peel off the wrapper of 2 cans of sweetened condensed milk.  DO NOT OPEN.  Put in a large pot and cover with water.  Boil for 3 hours, adding water as it evaporates.  After 3 hours, remove the cans and let cool completely. 

OR

You can make homemade caramel which is less time consuming but a little tricky. (I've made this before.  It's knock your socks off amazing)

OR

I'm sure you can use store bought caramel or melt down caramels, but why?

Directions:

1.  Whip butter for 30 seconds on high.
2.  Add caramel and vanilla and whip for another 30 seconds.
3.  Slowly add powdered sugar and salt.  Continue whipping for another minute or so.

Frosting should be light and fluffy and should hold it's shape when you lift the beater out of the bowl.  If it needs to be stiffened, add more powdered sugar.

Pipe or spread frosting onto cupcakes.


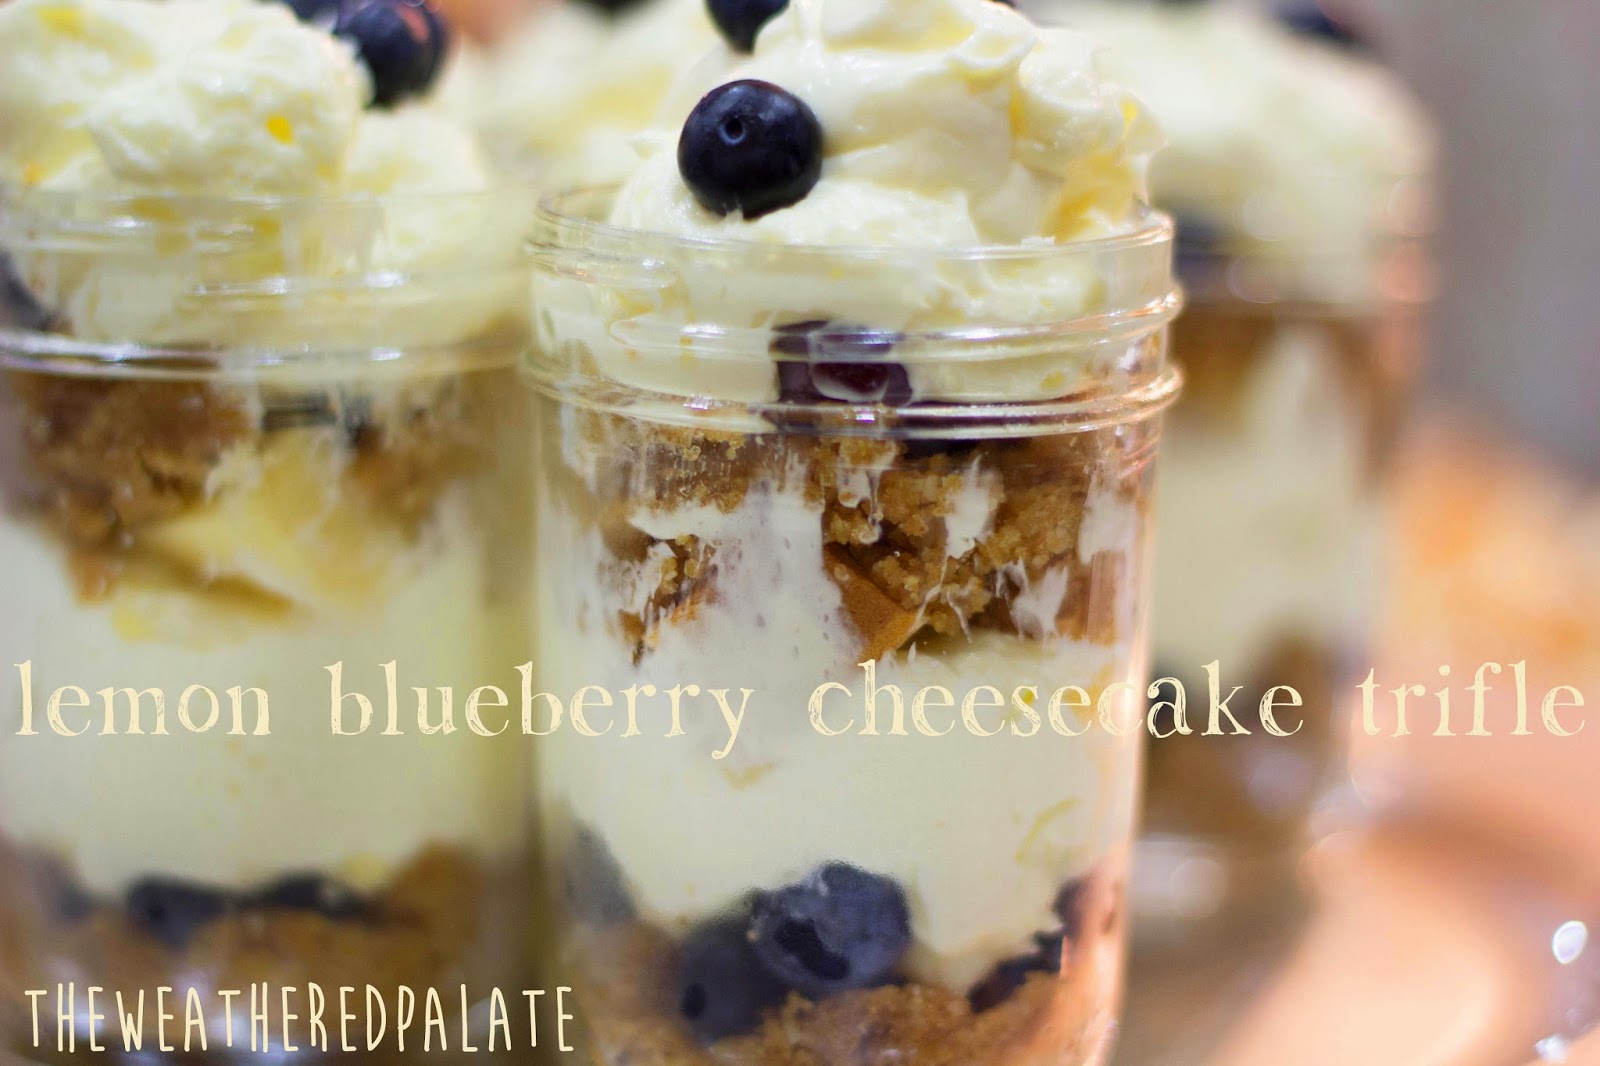
Lemon Blueberry Cheesecake Trifle


These babies made the dessert table at my father-in-law's surprise 60th birthday party!  He is a lemon fanatic so we had to have something with lemon in it.  The cheesecake filling is perfectly lemony and the pound cake and streusel are simply divine.  I'm so glad that we found these on Pinterest!  Bitchin Kitchen nailed this recipe!


The cheesecake filling is so delicious!  We spread the leftover filling on graham crackers.  Mmm...


Oh man, look at those desserts!  Some of the best I've tasted!

Wednesday, September 3, 2014

Key Lime Coconut Bars


It may be September, but summer isn't over yet!  Not only is the high topping off at 106 today but I have far too many key limes for it to be over!  I have all sorts of ways to use up these babies starting with these delicious Key Lime Coconut Bars!  With a consistency of a light and fluffy brownie paired with the delicate flavors of the glaze and crunch from the coconut these bars are sure to please everyone.

I have never used key limes before and I learned a few things.  I've always wondered how they were different from regular limes and now I know:
1.  They have seeds
2.  Those suckers are juicy!
3.  The juice is much sweeter than a regular lime.

Now I'm willing to admit that it could have just been this particular batch of limes but since it's the only experience I've had I'm gonna run with what I know until I discover otherwise. 


Ingredients:

1 1/2 cup flour
1 1/2 cup sugar
1/3 cup key lime juice
1 teaspoon key lime zest
1 teaspoon salt
1 cup butter
4 eggs

Glaze:
1 3/4 cup powdered sugar
1 tablespoon key lime juice
2 tablespoons canned coconut milk
1 cup toasted coconut

Directions:

Preheat oven to 350
1.  Zest and juice about 13 key limes, use 1/3 cup for batter and 1 tablespoon for glaze.
2.  Cream butter and sugar until fluffy.  Then add eggs, zest and lime juice.  Mix until blended, stopping to scrape down the sides.
3.  Add flour and salt and mix until combined.  The consistency should be that of brownie batter.
4.  Pour into 9x13 cake pan and bake at 350 for 25 minutes.  The edges should be lightly browned.
5.  Make glaze by combining the powdered sugar, lime juice and coconut milk in a bowl.
6.  To make toasted coconut, put 1 cup of coconut in a skillet on top of stove over medium heat.  Stir frequently to keep coconut from burning.  When the coconut is all lightly browned, turn off the stove and put the coconut on a paper towel to cool and crisp.  If you leave it in the pan, it'll continue to cook and burn, so don't!
7.  When the bars have cooled, pour glaze on the bars and spread evenly.  Sprinkle with toasted coconut.  Cover and put in refrigerator until time to serve.

Serve chilled and with a smile on your face.


Friday, August 29, 2014

Coconut Cupcakes

This was one experiment gone right.  Very, very right. 
My husband came home saying those magic words again, "honey, we have a potluck on Saturday."  No problem.  Except these may not make it to the actual potluck.  The texture of the cupcake is like that of a pound cake but is airy like an angel food cake.  I'm not sure I can come up with words to describe just how great these are.

Let's be honest, your cupcake falls over too after you take a bite.  Photo-opp!

Ingredients:

1 box of white cake mix
1 cup of canned coconut milk
3 eggs
1/3 cup of oil
1 teaspoon of almond extract

For the frosting:
8 ounces of cream cheese (room temp)
2 sticks of butter (room temp)
5 cups of powdered sugar
4 tablespoons of canned coconut milk
1/2 teaspoon of almond extract
3/4 cup toasted coconut for garnish


Directions:

1.  Preheat over to 350 degrees and line a cupcake pan with cupcake wrappers.  (the cuter the better)
2.  Combine cake mix, coconut milk, eggs, oil and extract and mix on low until combined.
3.  Using a 1/4 cup measuring cup, scoop out batter and spoon into cupcake pan.  Equal scoops, please!
4.  Bake for 15-20 minutes or until toothpick comes out clean.
5. While cupcakes are cooling, make the frosting.  Combine cream cheese and butter and whip with coconut milk.  (I use my whisk on my Kitchenaid mixer, not the paddle) add extract then slowly add powdered sugar until it's all combined.  Turn on high to whip for 45-60 seconds.  Toast the coconut by putting 3/4 cup of coconut in a skillet on the stove over medium high heat.  Stir frequently for 5-6 minutes or until coconut is toasty brown.  (you can also do this in your oven on a baking sheet)
7.  I used a frosting bag and cut a one inch hole in the bottom (ziploc bag would work well too).  Pipe the frosting on the cupcakes.  As you squeeze the frosting bag, push down, then pull up to create the large fluffy clouds.  Top with toasted coconut.


I did not refer to any other recipe while making these cupcakes.

Thursday, August 21, 2014

Peanut Butter Oatmeal Cookies

It's a rainy day.  Okay so there are only clouds but I'll take what I can get.  We spent the whole day at home which was much needed break from the non stop running we seem to always be doing.  We had some good play time measuring, mixing and baking our pretend ingredients, which led up to our little baking episode today.  I'm out of butter so I had to find a recipe that would adapt to my current household staples.  The recipe is from Ambitious Kitchen, which I thought was fitting seeing how I was baking with a toddler.  Sometimes, you just need to make memories.


He was so great at helping me clean up.  He's been dying to get a hold of that faucet and play with it.  Well today was his day.  My floors needed to be cleaned anyway.


Now for the cookies.  These were perfect.  No flour, no butter.  They are so chewy and the perfect balance of peanut butter and chocolate.  I happened to have extra almonds left over from my grilled chicken and romaine salad so I added them and am so glad I did.  This recipe is so easy and absolutely delicious.


Click here for the recipe.