Thursday, September 24, 2015

Oatmeal Cream Pies


Hello Fall! 

Today was a day of baking and making.  I haven't baked and cooked and prepped so much in such a long time and it felt wonderful to be in my kitchen doing just that.  I didn't intend to make so much in one day but I was just on a roll which resulted in pumpkin oatmeal, pumpkin spice creamer, frozen cookie dough bites, lots of grilled cheese, buffalo chicken strips and a few other miscellaneous items.  Before our morning play dates arrived at 8:30, I had my first batch of baked pumpkin oatmeal in the oven.  Oh sweet Lord almighty, they were heavenly.  The pumpkin oatmeal was the perfect way to start the season but this post is about something even sweeter with a trip down memory lane.   


As I'm sure they were for you, these were such special treats for us growing up.  I remember so many times when my dad would bring home a box for us or devouring them on road trips.  It's been so long since I've had an original Oatmeal Cream Pie, and this recipe is to blame. 

I love making goodies for my husband to take to work and these are extra special.  They disappear within minutes of his announcement of a homemade version of one of America's favorite treats.  These aren't sickeningly sweet like the store bought versions are which make them even more enjoyable. While the cookies are crispy on the edges and soft in the middle with hints of cinnamon throughout, it's the cream that sends these babies over the top.  

I have been making this recipe for 4 years now and haven't deviated from it once and they are perfect every time.  When I first started making these, there weren't a whole lot of recipes out there but now there are quite a few and after comparing them, this one takes the cake....or the cookie.  And no, they aren't "clean" like a lot of my recent recipes have been but I will be coming up with a clean version to share with you soon!  For now, enjoy these babies adapted from Nosh With Me (via The Craving Chronicles.)


Ingredients

Cookies:
1 cup butter
3/4 cup dark brown sugar
1/2 cup sugar
1 tablespoon molasses
1 teaspoon vanilla
2 eggs
1 1/2 cups flour
1/2 teaspoon salt
1 teaspoon baking soda
1 teaspoon cinnamon
1 1/2 cups quick oats

Filling:
2 teaspoons hot water
1/4 teaspoon salt
1 (7 ounce) jar marshmallow cream
1/2 cup shortening
1/3 cup powdered sugar
1/2 teaspoon vanilla

Directions

1.  Cream butter, sugars, molasses and vanilla in the bowl of a stand mixer.  Mix in eggs one at a time.
2.  Add flour, salt, baking soda and cinnamon.  Mix until just combined.  Stir in oatmeal.  Make sure you scrape the edges and the bottom of the bowl to make sure the oatmeal is incorporated throughout the whole batter.
3.  Using a small cookie scoop (or tablespoon) drop onto cookie sheets 2 inches apart.
4.  Bake in a 350 degree oven for 10-12 minutes (I usually do 10 minutes exactly).
5.  Once you take the cookies out of the oven, let cool for 2-3 minutes in the pan and then transfer to a wire rack. 
6.  While cookies are cooling, make the filling.  Dissolve salt in hot water and let cool.
7.  Whip shortening and marshmallow cream, add salt water, sugar and vanilla and whip until combined.
8.  Once cookies have cooled, spread cream on the bottom of one cookie and place the other on top.
9.  Try not to eat them all.  Unless that's why you made them.  And then contact me about a Beachbody program to help you lose the weight you gained from eating the Oatmeal Cream Pies.

Notes: Yes, hot water for the filling is necessary because the salt is necessary.  If you try to add the salt to the cream by itself, it won't fully incorporate into the cream.  If you have ever had an improperly seasoned sweet, you'll understand the importance of salt in sweets!  They are bland.  I hate when I forget the salt.

When I made this batch, I made a double batch which meant a long baking time because I had so many trays.  I let the batter sit on the counter and as a result, the butter melted due to the heat of the oven (makes our house hot!) and when I put them in the oven, they completely spread out and I ended up losing my last two trays of cookies.  So, keep the butter at a softened state by refrigerating the batter in between baking times.


Happy Fall, Y'all!


Wednesday, September 2, 2015

Office Organization + Ikea Hacks


We have lived in our house for about 3 years and I have always lacked a work space for myself.  Usually I'd grab my computer and work at the dining room table.  The problem with that is I don't like putting my work away in the middle of a project so I would just leave it (and the clutter it created) out on the table...in a "neat" pile of course.  But as the boys got older leaving an open laptop around just wasn't an option. 

I really do love to organize but I need a place to put things.  If I don't have a place for everything, I won't put it away and it'll just stare at me as I walk by and I'd think, "I need to find a place for that"...and keep on walking.  My husband doesn't understand that way of thinking.  My husband-has the same routine every night and puts his keys and wallet in the same place every night-is very predictable.   So you can imagine how he felt when we first got married and I'd put my purse in a different spot every time I came home.  Oh the growing pains marriage causes.  Thankfully we both survived! 

A few months ago, I'd had enough and decided it was time for me to invest in my space.  Now, you know how I do projects, as on little a budget as possible.  When buying diapers every month it's hard to justify spending money on other things...diapers are apparently necessary.  I don't have any before pictures but I have some pretty awesome after pictures which is all that matters.  If you want to know what it looked like before, picture nothing but a table, laptop and a pile of papers before.  Oh and a huge lamp. 

Let's start with these boxes.  Cute, right?  I have a thing for gold right now.  My husband can't believe I like gold so much, I hated it when we first got married.  But I have evolved. 

This is Ikea Hack #1.  


I spent hours looking for just the right storage boxes at both the Container Store and Ikea.  Although I'd love a beautiful set from Container Store, Ikea was more in my budget.  I saw these boxes displayed like this on an end cap and really like the look of them together but I wasn't digging any of the colors.  They had a few boxes that they had jazzed up with washi tape but I didn't like the tape they had!  So as I'm walking aimlessly from aisle to aisle while my husband is entertaining two toddlers inside a mega store, a light bulb went off.  Spray paint!


I wanted polka dots on a few boxes so I used little garage sale stickers and covered the boxes then spray painted the boxes.  So. Darn. Cute.  The camera photo holders came from Target.  My shelves came from Home Depot.


The white storage boxes on the left are also from Ikea and are currently empty but will be filled soon!  The black box contains CDs and CD sleeves I use for various projects.  I lucked out and found the gold and white striped frame on clearance at Target after Mother's Day.  Three cheers for Target clearance!  The random mason is one of my first Pinterest projects I just can't seem to get rid of.  I put a photo of my husband and I in a mason jar then filled with oil.  I know, sounds weird but it's actually really cool.  


In my last post, I told you I would talk about these super cute jars.  They are Ikea Hack #2. I bought a set of 4 spice jars for just a few bucks and spray painted the lids the same color as the boxes.  I wouldn't suggest spray painting the lids if you're planning on using them for food items.  Paint and food don't go together.


The "cool, cool car" (as my toddler says) is not included.  


Target is probably my favorite place to go.  In fact I have another Target date (second one today) when I finish this post.  There is always something that needs to be bought.  This bulletin was actually my inspiration for my space.  I really like the collection it's apart of.  I haven't bought gold scissors or stapler though...gotta draw the line somewhere!


This monitor stand in the same collection as the bulletin board.  I use two monitors so it's really convenient to set my second monitor on top of.  Not to mention it has a drawer of it's own.  Now hopefully I won't forget what's in the drawer.


Let's talk about this planner!  As mentioned in my previous post about Weekly Planning,  I use a cookbook stand to keep my planner open to the month view.  For the longest time, I was coming home and keeping my planner closed, which makes it easy to forget.  I'm tired of forgetting things.  This solution has made a big difference for me!  Hopefully it will for you too!


Guess where this is from?!!!  TARGET!!!  It was originally a light brown but I paint it white and sprayed the accents in gold.  The hooks are so convenient and my supply jars fit perfectly. 


To be honest, it's not always this clean.  In fact I threw a bunch of stuff in my monitor stand drawer to hide for pictures.  When we see pictures and ideas like this online everything is clean and perfectly placed.  That's because it's a photoshoot, and in photoshoots, items are staged.  So don't stress and think you're not living up to standard.  No one lives in a photoshoot.  


I hope you were inspired by some of these organization tips and tricks!   

Tuesday, September 1, 2015

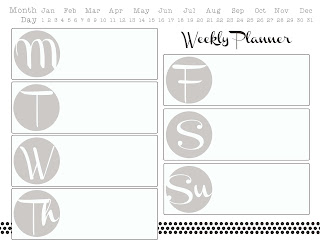
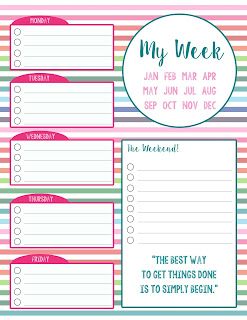
Weekly Planning + FREE PRINTABLES!


I've been a stay at home mom now for 3 years and I'm still trying to figure out how to balance everything.  I'm sure once I get the hang of it we'll hit another phase and everything will change...again.  I'm trying to focus on getting my "work" done first before I "play".  I didn't choose to stay at home so I could blog, work on projects or hang out with friends.  I became a stay at home mom to take care of my family and home so that has to be my priority. 

I really do love to be organized.  Who doesn't?  But sometimes I spend too much time day dreaming about how I can be better organized instead of actually being organized.  I have a planner that I use for meetings and write everything down and get home, close it and forget about it.  How is that effective?  It's not!  So even though I have cute pens and a stinken cute planner my methods are not working.  So I've come up with some processes to keep me better organized for myself, my family and the church that I serve (did I mention I'm the Early Childhood Director at my church?)  After living in our house for 3 years, I've finally gotten my work space just the way I want it complete with storage bins, bulletin board, shelves and my handy dandy planner stand (also known as a cookbook stand).  Now I keep my planner open to the month view so I can better plan ahead.  I don't use my planner for every little thing but I save it for my big meetings and events since quite a bit of what I do needs to be done in advance.  But I've gotta have break down of my week right in front of me.  Am I weird?  Don't answer that.  I made a weekly planner for myself to hang on the fridge and that's where  I write down my meals, errands I have to run, what needs to be cleaned...you know...all the tedious stuff that would otherwise get lost in my big planner. 

I hang my planner on the refrigerator using washi tape because I care about details like that!  I was using my son's stickers but I just wasn't feeling the cartoon dog.


We made a punch card invite for my sister's engagement party so I carried the theme over to this planner.  Circle the month and the days that it's for, or don't.  Whatever. 

Don't feel like you have to only use printer paper!  I used left over brown craft paper to make a statement.  It's sturdier too so it'll hold up as I tote it around. 


Cute pens are a must.  I'm more motivated to write things down when I have a cute and colorful pen.  I know I'm not the only one.

 
In another blog post, I'm going to tell you all about my office organization which includes these really cute jars from Ikea! 


Click on each image to download!
https://drive.google.com/file/d/0B7nzYWLmDiBhOXJzQ0p2al82UmM/view?usp=sharing

https://drive.google.com/file/d/0B7nzYWLmDiBhZEZuRl95T3IzUjQ/view?usp=sharing

https://drive.google.com/file/d/0B7nzYWLmDiBhNV9CajFqMUozVUU/view?usp=sharing

https://drive.google.com/file/d/0B7nzYWLmDiBhMWQxRVpEQmZWTWs/view?usp=sharing

https://drive.google.com/file/d/0B7nzYWLmDiBhQlF0d3VMZ0ZmVFE/view?usp=sharing